Creating a listing extractor
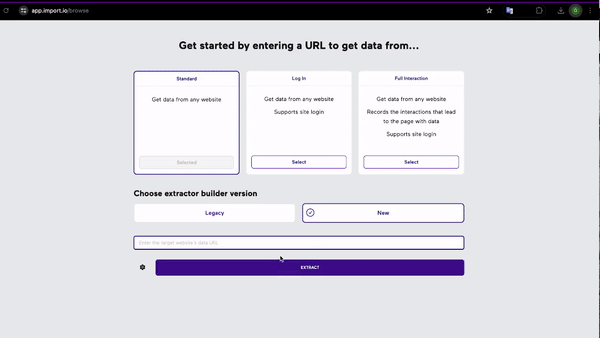
After login into your account, you will land on the Import.io Dashboard. Start by clicking on the Extractors tab on the left and then click on New Extractor at the top of the left pane and paste the URL of a business page in the Create Extractor screen. In this example we will use https://www.owlkingdom.com/, finally click Extract to load the page.
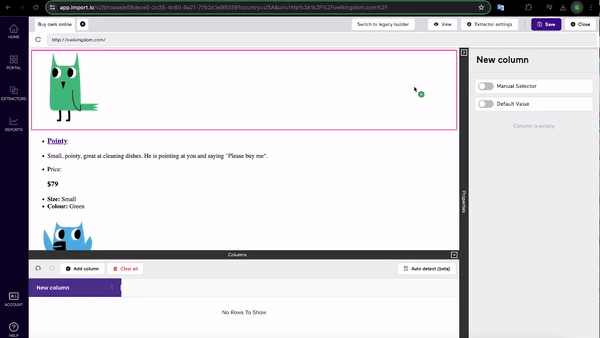
Once the page is loaded, Owl Kingdom is presented.
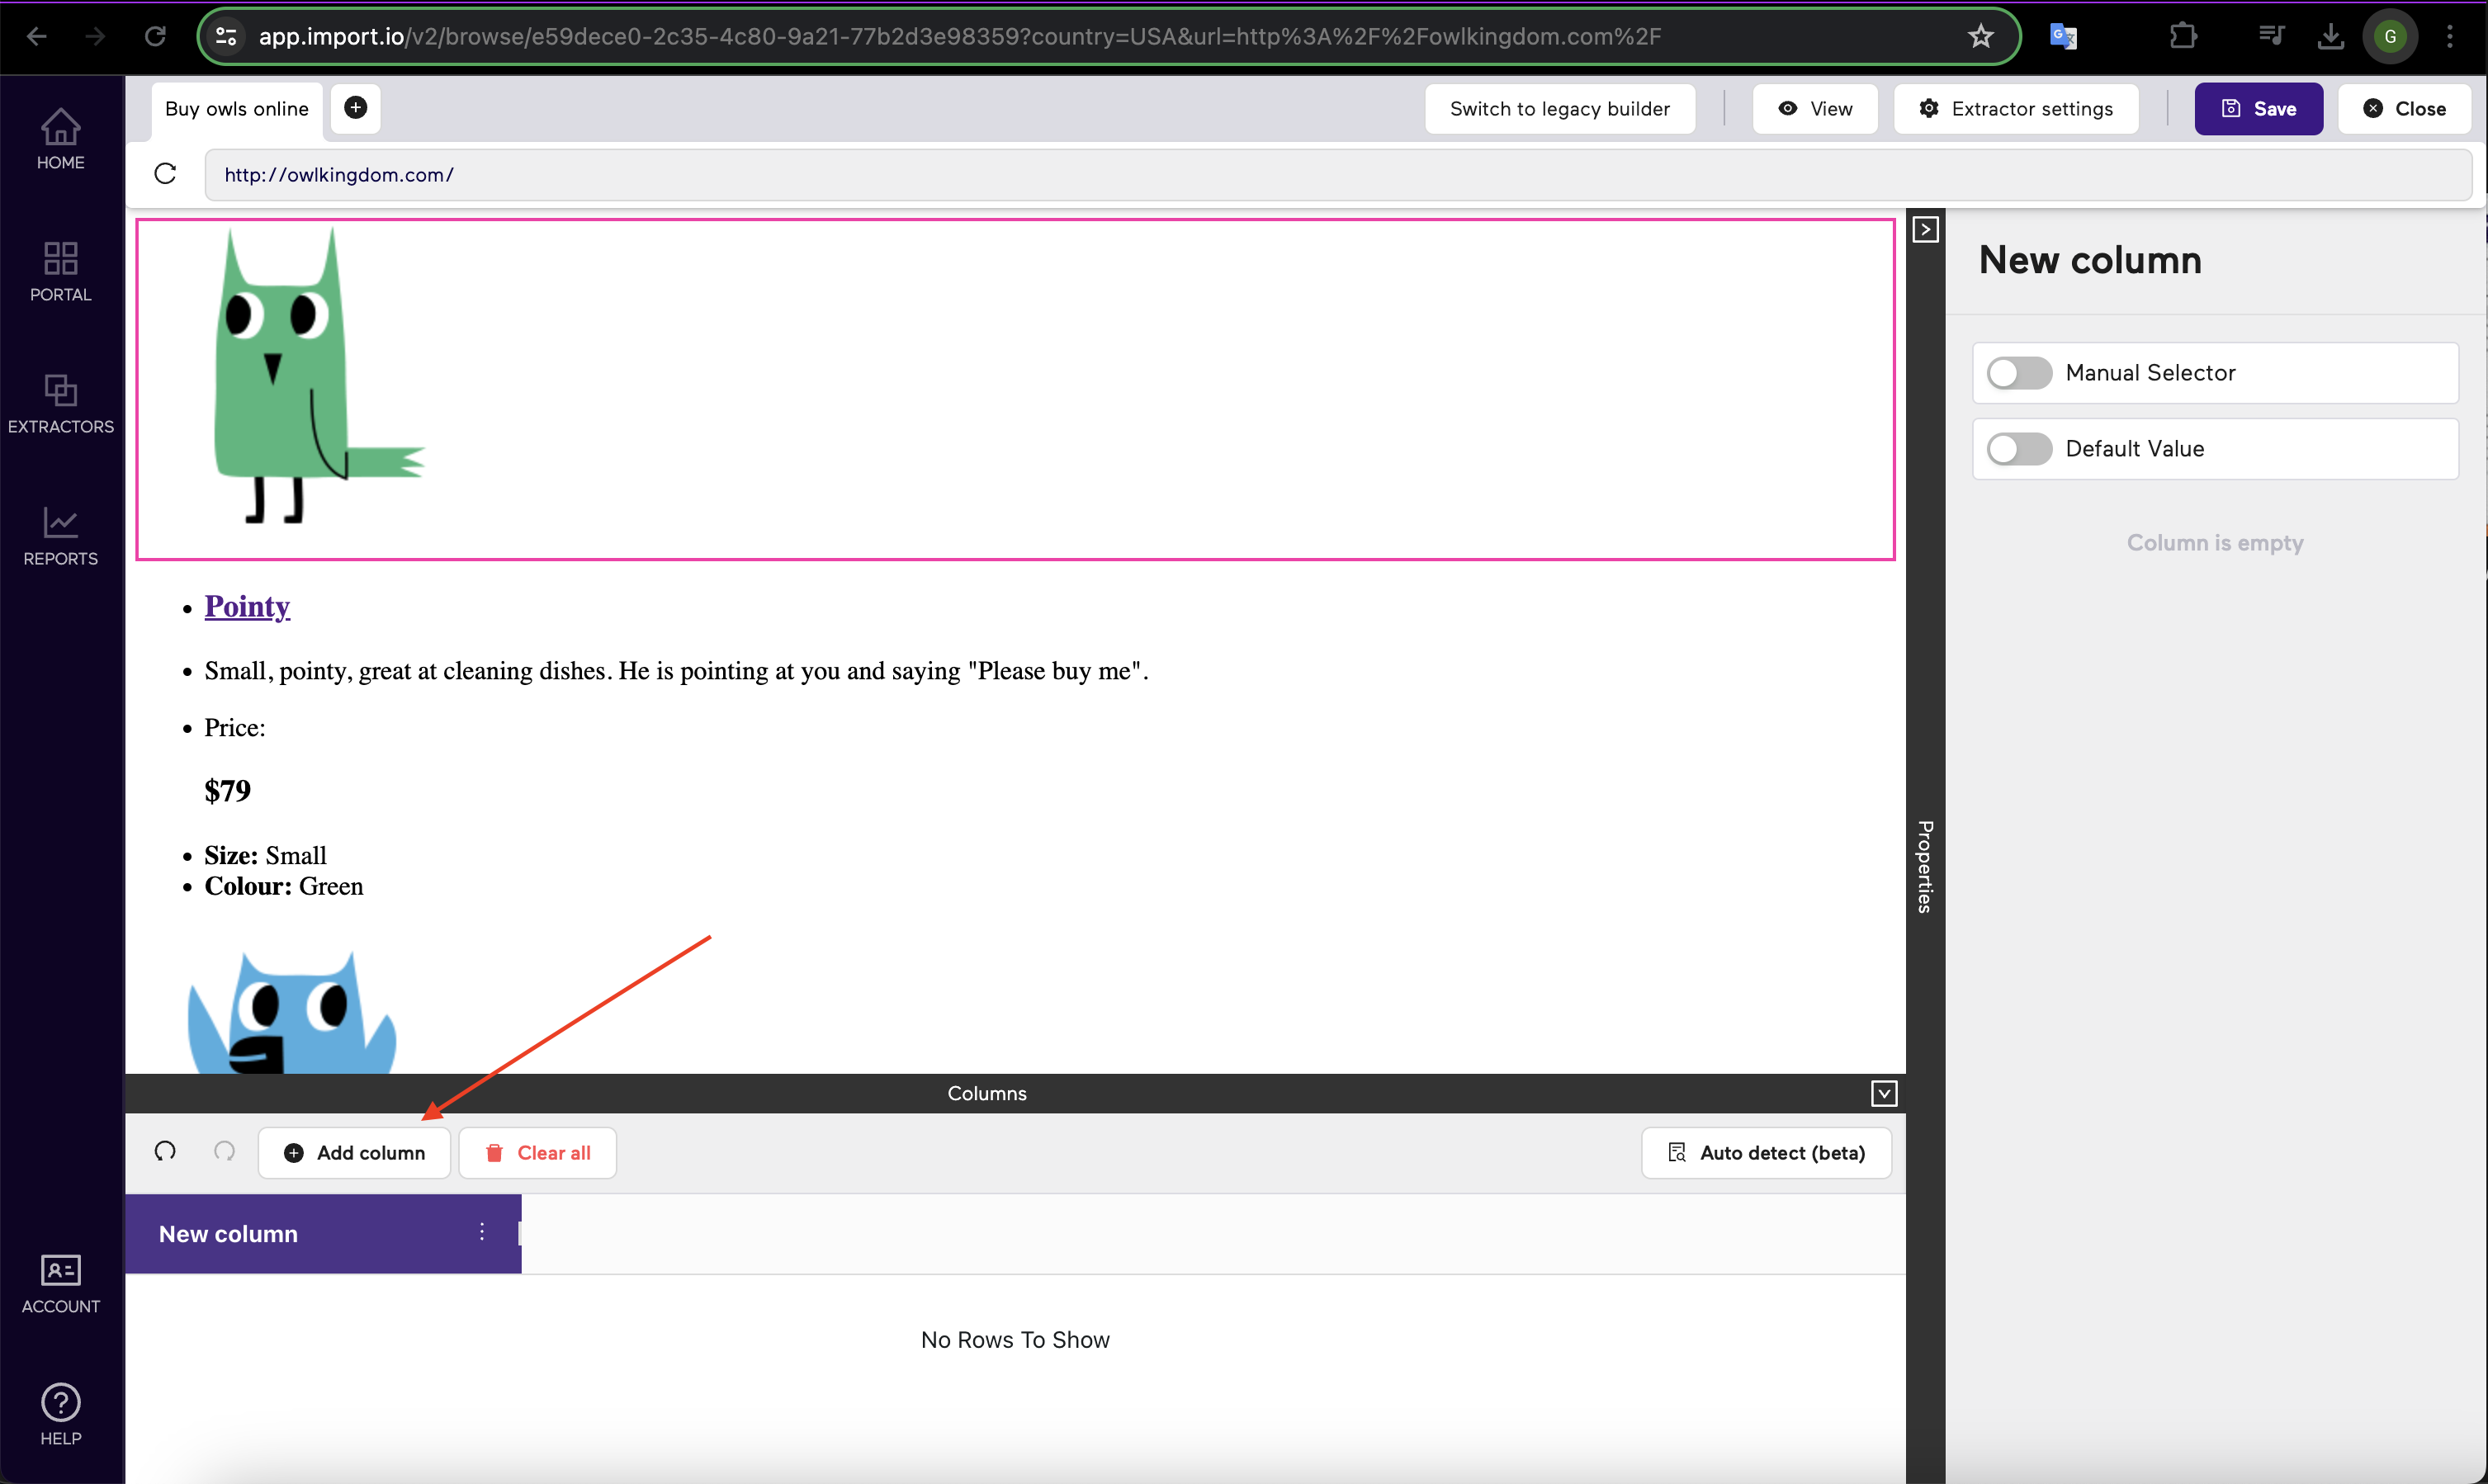
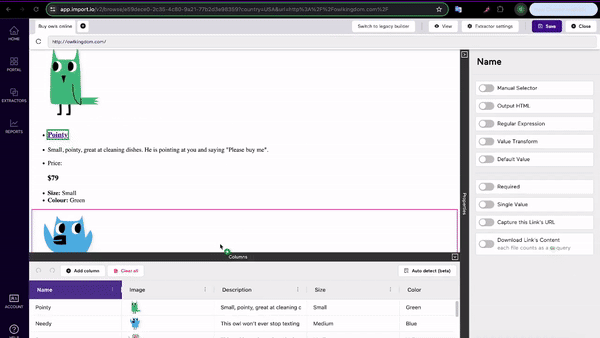
To add a data point, you can click on the button Add column to add a column, and then click on the website to select that data point. When hovering your mouse over the website, a red outline will follow your mouse to show what will be selected. Once the data has been selected, the red box will turn green. To name or rename this column use the button inside the column, or double-click the name of the extractor.
Saving and Configuring Your Extractor
Save Your Extractor Instructions:
With the desired data points selected, click the Save button to save your extractor.
Configure Extractor Settings:
Upon saving, a modal/pop-up will appear with two configurable settings:
- Extractor Name
Description: A text box that allows you to change the name of the extractor. Instructions: Click inside the text box and type the desired name for your extractor.
- Email Alerts
Description: A check-box to opt into email alerts upon the completion of the extractor process. Instructions: Check the box if you wish to receive email notifications when the extractor has completed its task.
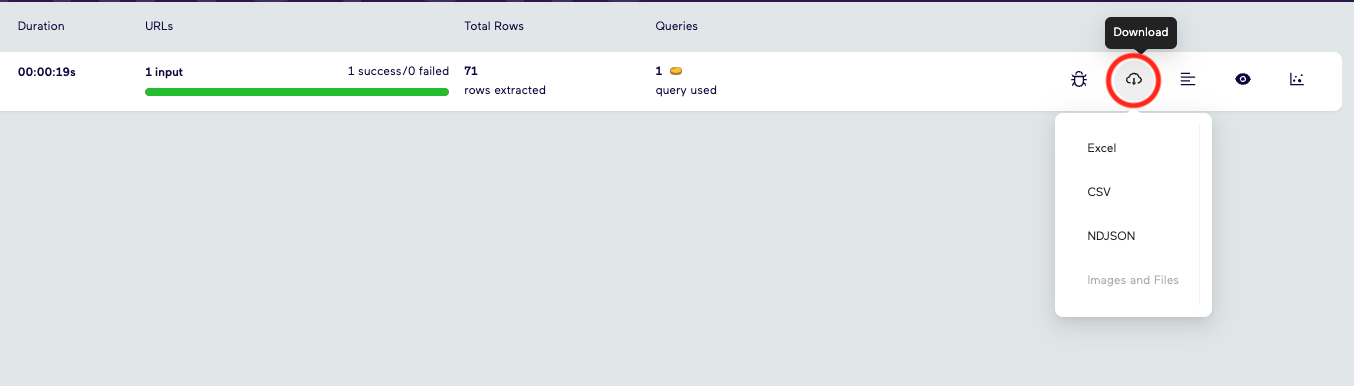
Once the extractor is saved, it will redirect you to the Dashboard. Wait for the extractor to finish running. Once finished, Import.io will give details about the run, such as the time and date it was ran, how long the run took, how many rows of data were extracted, and how many queries were used. You can see a preview of the data gathered by clicking the 'Eye' Icon, or download the data in multiple different formats by clicking the 'cloud' icon.
With your first extractor created, you'll want to move on to the fine-tuning and editing part of the extractor.